發表文章

目前顯示的是 7月, 2019的文章

How to Run Chkdsk in Ubuntu

How to Run Chkdsk in Ubuntu Chkdsk is the Windows command for checking hard drives for errors and repairing them, if possible. If your company uses the Ubuntu Linux operating system rather than Windows, the chkdsk command will not work. The equivalent command for the Linux operating system is "fsck." You can only run this command on disks and filesystems that are not mounted (available for use). If you want to check a root filesystem (the filesystem that contains the base operating system commands), you should boot to a live Ubuntu CD. 1. Right-click on the desktop and choose the "Open in Terminal" option from the menu that appears. A terminal window opens. 2.   Type the following command to unmount the drive you want to check: sudo umount /dev/sdb Replace "/dev/sdb" with the device name for the drive you want to check. 3. Type the following command to check the drive: sudo fsck /dev/sdb The command may take some time to c...

How to Install FreeCAD 0.18 in Ubuntu 18.04

圖片
FreeCAD, free and open-source 3D parametric modeler, released version 0.18 recently with  Python 3  and  Qt 5  support. Here’s how to install it in Ubuntu 16.04, Ubuntu 18.04, and Ubuntu 19.04. FreeCAD 0.18  release highlights: Extended TechDraw tools New sketcher tools, more stable and robust PartDesign Enhanced and extended Arch and BIM tools Redesigned Start center New Navigation Cube Specify a custom background image for FreeCAD’s main window Install or Upgrade FreeCAD in Ubuntu: The official  FreeCAD PPA  has built the latest release packages for Ubuntu 16.04, Ubuntu 18.04, Ubuntu 19.04, and their derivatives. 1.  Open terminal either via  Ctrl+Alt+T  keyboard shortcut, or by searching for ‘terminal’ from app menu. When it opens, run command to add the PPA: sudo add-apt-repository ppa:freecad-maintainers/freecad-stable Type user password (no asterisk feedback) when it prompts and hit Enter to continue. 2. ...

How to setting gcc and g++ symbolic link for any version of install on Ubuntu 18.04

How to setting gcc and g++ symbolic link for any version of install on Ubuntu 18.04 1. delete /usr/bin/ gcc and g++ $ cd / usr / bin $ sudo rm gcc g ++ 2. do symbolic link for gcc-7 and g++-7 $ sudo ln - s gcc - 7 gcc $ sudo ln - s g ++ - 7 g ++ that's it.

How to disable ubuntu 18.04 desktop animation

圖片
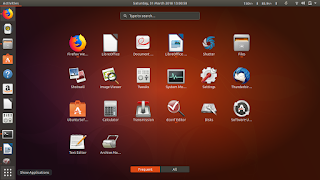
Do you find your Ubuntu 17.10 and 18.04 are slow to open menu? Do you use GNOME 3.26 or above? Do you use old hardware? Then you may need to disable the GNOME Shell desktop animation instead. This will turn off all kind of animations especially the spreading icons on menu, searching, and window animations so you can work faster. To do it, just run this command: $ gsettings set org.gnome.desktop.interface enable-animations  false Then apply it by pressing  Alt+F2  and type   r   and press Enter. This will reset the GNOME Shell to follow your command.  To revert it back (enable animation again), just change the command to: $ gsettings set org.gnome.desktop.interface enable-animations  true Note: if you are curious enough about it, because it might looks like Regedit code for you, then install the program  dconf-editor  and go to /org/gnome/interface/ and you will find Enable Animations option there with ON/OFF toggle. dconf...

Thermaltake曜越 Versa H23機殼加裝美光crucial MX500 500gb ssd 與 換機殼開關 (開箱)

圖片
這個Thermaltake曜越 Versa H23機殼已經使用了4年半左右了,這個機殼不錯用,價格也平價,唯一缺點是開關容易壞,剛買來沒多久開關就很難按了;時常要按很久才能開機。 這台機器是爸爸在使用的主機。這次目的是加裝新的SSD並安裝windows 10。所以順便買新的電源開關換上。 這台電腦之前在2014年11月時買的配備我記得是 cpu: intel XEON e3 1231v3 dram: kingstone HyperX Fury (HX318) 8+8 DDR3 MB: MSI Z97S SLI KRAIT EDITION 下圖的美光crucial MX500 SSD已經裝好準備安裝windows 10了。 圖1: ssd安裝位置如紅色的框所示。 這次共買了如下的配備: 1. 美光 crucial mx500 500gb 2.5" ssd (5年保)。 2. 30元無段開關。 圖2: 美光 CRUCIAL MX500 500GB SSD  (5年保) 。 圖3: 美光crucial mx500 500gb 2.5吋 ssd  (5年保) 。拆開後的樣子。 圖4: 無段式開關,紅黑色,頗有電競風格。 換開關使用工具有: 1. 電烙鐵+焊錫。 2. 尖嘴鉗與斜口剪。 3. 銼刀。 4. 電線膠帶或熱縮套。這次我沒有買熱縮套,直接使用電線膠帶黏上。 換開關步驟: 1. 將機殼原本電源開關的線拔下來。 2. 使用斜口剪將電線從皮中移出一些,電線內部電線蕊裸露的長度夠用即可,我這次使用約半個母指甲長度。 3. 使用電烙鐵+焊錫將電線與開關焊上。再用電線膠帶或熱縮套封住電線裸露部分即可。 使用以前學生時代買的電烙鐵。 焊完開關成品。接著在焊接部分黏上電線膠帶或熱縮套即可。 開關安裝在機殼上的樣子。安裝開關的洞我使用斜口剪將金屬與塑膠的部分剪掉,再將開關鎖上去即可。 如此有全新好用的開關。 這次換完ssd後開機速度有較原來的3.5吋 7200轉hdd硬碟快(之前的硬碟是WD 5年保固的 2TB  電競碟(黑標)  (2003FZEX)) 且換完開關後,電源開關也按...

windows 10 將網域改為公用網路或私有網路(windows 10 change network to Public or Private)

圖片
公有網路:在公開場合的網路。如本圖在咖啡廳的網路,屬於公開場合,請改為公有網路。且要注意分享內容。 私有網路:在私有領域的網路,如區域網路,如果確定區域網路是安全的,如住家自己架設的網路,則可以設定這個選項,可以較方便的分享電腦的資源。 如果有需要重新設定windows 網路為公用或私用, 可以用下列方式設定: 使用windows 10 的power shell: A. 設定網路介面為公用網域: Set-NetConnectionProfile -InterfaceIndex 15 -NetworkCategory " Public " 或 B. 設定網路介面為私有網域: Set-NetConnectionProfile -InterfaceIndex 15 -NetworkCategory " Private " 上面的InterfaceIndex號碼為15 查詢方式可下 netsh interface ipv4 show interfaces output: Idx     Met         MTU          狀態                 名稱 ---  ----------  ----------  ------------  ---------------------------  15          55        1500  connected     Wi-Fi  27           5        1500  disconnected  乙太網路 上面的Idx就是 InterfaceIndex ...